Before I went vegan, I was obsessed with cheese. One of my favorite things was to stop by a well-stocked cheese case in a grocery store and read all of the names of the cheeses and wonder what each one tasted like. I used to consume whole wheels of brie in one sitting, savoring its oily gooeyness, or repeatedly slice into marbled hard cheeses, admiring the different patterns revealed in each slice before relishing each bite. However, once I went vegan, that obsession went away and, after sampling a slice of commercially prepared vegan cheese and hating it, the need for the taste went away altogether.
A few years later, I fell in love with grilled cheese made with Tofutti slices, and teared up when I tasted melted Daiya for the first time during a trip to Seattle at Pizza Pi. Commercially prepared vegan cheese has come a long way over the past few years, and I now consume and savor it with the same level of obsession I used to have with dairy-based cheese.
Even though I can easily buy Daiya or Tofutti the shelf, I still like to experiment with making vegan cheese at home. After seeing several intriguing methods for making nut-based fermented cheese floating around out there, I decided to develop a similar version using coconut vinegar and coconut cream, a combination I use often and love. Once combined, the vinegar and fat play perfectly off one another, and the level of richness and acidity can be easily manipulated by tweaking the ratios.

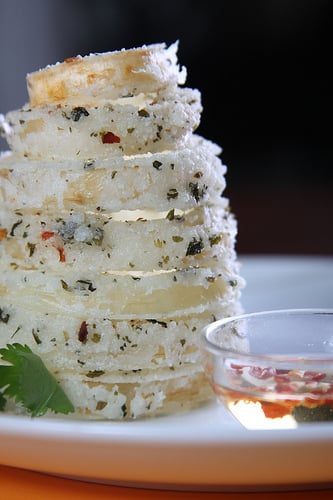
I made several test batches of this cheese and think that placing it into a dehydrator for 6 hours produces superior results, but it can also be placed in a dark spot at room temperature for 12 hours to develop. The dehydrated version will offer a more intense and complex depth of flavor with a slightly darker color, while the room temperature version will yield a mild flavor and a brilliantly white color. If the concept of fermenting/culturing isn’t your thing, you can skip it, and simply place the mixture into the refrigerator for the flavors to mingle for 12 hours before adding any additional flavorings (suggestions below).
Get This Recipe In Your Inbox
Share your email, and we’ll deliver it straight to your inbox.
Plus, enjoy new content every week as a bonus!

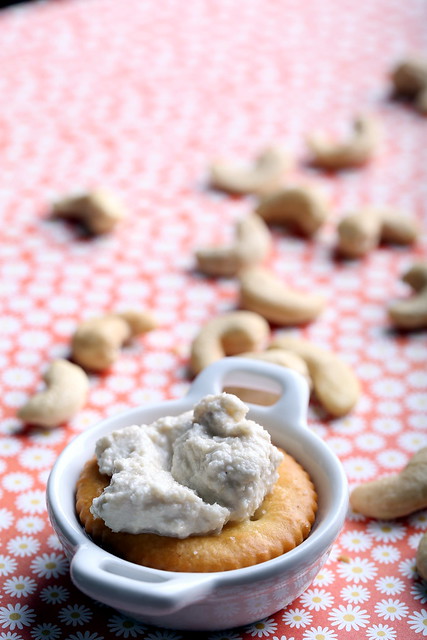
CULTURED CASHEW CHEESE
- Total Time: 24 hours 10 minutes
- Yield: 1 cup cheese
Ingredients
- 1 cup whole raw cashews, soaked overnight
- 1/3 cup water
- 4 tsp coconut vinegar*
- couple pinches of salt
- pinch of sugar
- 2 probiotic capsules (open the capsule, and add the powder only to the mix)
- 1–2 TB unsweetened canned coconut milk (skim the heavy part off the top of the can)
Instructions
- Rinse the soaked cashews in cold water, then transfer to a blender or food processor. Add the water and puree until very smooth. It’s ready when you can rub the mixture between your thumb and index finger and not feel any grit.(I have an older blender, so I puree for a full minute, then allow it to cool/rest for a bit, then repeat about 5 times to obtain the right smoothness.)
- Add in the coconut vinegar, salt and sugar and puree again. Stir in the probiotic powder. Do not add in the coconut milk yet.
If using a dehydrator
- Scrape the mixture into a nut milk bag. Place into a dehydrator, flattening it out as needed if you have a layered tray dehydrator. Dehydrate at 115 degrees for 6 hours. Final result: intense flavor, slightly darker color.
If you don’t have a dehydrator
- Transfer the mixture into a sanitized glass jar. Cover with a tea towel and secure with a rubber band. Place in a dark spot (I put mine in my kitchen cabinet) for 12 hours. Final result: mild and tangy flavor, bright white color.
- If you don’t want to dehydrate or leave at room temperature: Transfer the mixture to a container and place into the refrigerator for 12 hours. Final result: mild and subtle flavor, white color.
- Next, scrape the mixture into a clean container and add in the coconut milk and stir. Add any additional flavorings to taste** (or leave it plain), then cover and place in the refrigerator for an additional 12 hours to allow the flavors to develop.
The cheese will last a couple of days in the refrigerator. Use it on bagels, crackers, crusty bread or with fruit and vegetables, or as a vegan goat cheese substitute.
Notes
* I think coconut vinegar is the best vinegar to use for vegan cheeses, and strongly recommend using it over apple cider vinegar, as I’ve received mixed reviews on using it in cheese applications like this.
** Herbs, dried or fresh, such as dill, tarragon or chives; olives, crushed nuts, minced garlic, nutritional yeast, tahini, sun dried tomatoes or mellow miso. Salt and pepper, to taste.
- Prep Time: 10 minutes