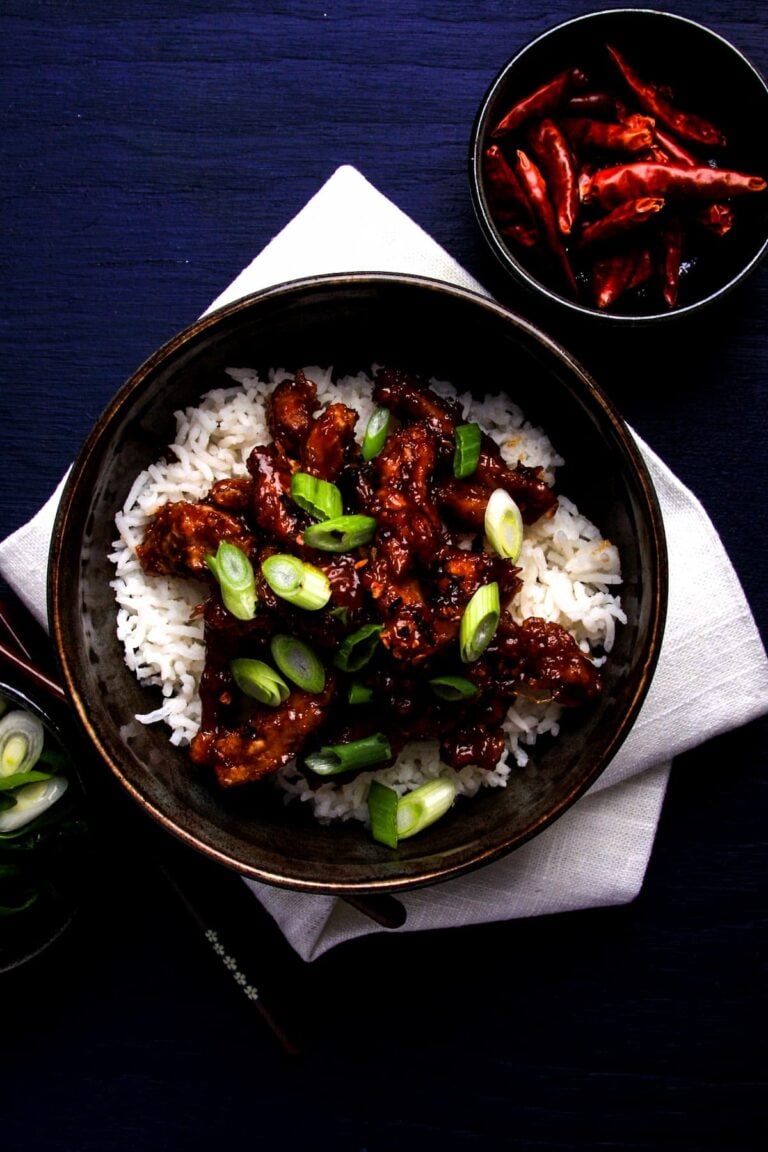
This vegan Mongolian beef dish is so crispy and tasty! Deep-fried soy curls are tossed in a thick ginger-garlic sauce with brown sugar, chilis and scallions. Serve with rice and roasted broccoli for a decadent dish that’s fun to make and eat.

Think back to the last dish you ate that made you tip your head back, fist pump or maybe blurt out an expletive or two after the first bite? These Mongolian soy curls are one of those dishes that will make you do at least one of those, or maybe all three.

Here’s Why You’ll Love This Vegan Mongolian Beef Recipe
Crispy soy curls are tossed in a clingy, salty, gingery sweet glaze that keeps you going back for just one more bite until you realize you’re uncomfortably stuffed, but in a way that you’re kind of okay with because it was totally worth it.
Originally made with beef, this dish was super easy to veganize. Although I used soy curls here to provide an awesome, faux-meaty texture, this could also be made with cauliflower florets, chickpeas, tofu or even sweet potato chunks. Serve with plain noodles or rice and greens, which pairs perfectly with the intense flavors of the sauce.
Looking for more plant-based meal ideas with protein? Our high protein vegan meal guide has lots of them!
Key Ingredients For This Dish
This easy vegan Mongolian beef recipe is a bold-flavored dish that offers salty, sweet, umami and spicy flavors. Let’s break them down!
Soy Curls: These are made from whole soybeans which have been cooked and dehydrated. They are super light in weight, and must be reconstituted for about 10 minutes in water or broth. They work great here because their texture is similar to beef, and they are mind-blowingly delicious when deep fried!
Hoisin Sauce: Hoisin is a thick sauce made from soybeans that delivers complex flavors with notes of sweet, acidic, umami and salt. Most hoisin sauces are vegan, but be sure to check the label for any animal-based ingredients like anchovies.
Ginger: I love the texture and aroma of fresh ginger! It’s spicy and warm and works so well in this sauce for it’s flavor and texture.
Garlic: Pleasantly pungent with a bit of spiciness, garlic works great in this dish. I love the combo of garlic, ginger and scallions and they are all perfect together in this dish.
Fresh chilis: Depending on your preference for heat, fresh chilis add heat and freshness to this dish. Use a little or a lot.
Vegan broth: I love Better than Bouillon or Massel brand broth. Use whatever brand you like!
Soy sauce: This is going to add some complex saltiness and deep umami notes into the dish. Use tamari to make this dish gluten-free.
Brown sugar: Made by combining white sugar with molasses, this caramel-flavored sugar helps balance out the salty, acidic, spicy and umami flavors of the dish.
Serve with plain white rice or noodles. Plain works best here to balance out the bold flavors of the sauce! Add chopped green or broccoli if you’d like. Chopped scallions add a nice freshness and crunch to the dish.

Tips When Making This Recipe
Taste as you go! If you love spicy, add more chilis. If you want more saltiness from the soy sauce, feel free to add more. Serve with whatever greens you like or leave them out altogether. This is a dish that’s supposed to be fun to prep and cook as much as it is delicious to eat!
More Ways To Use Soy Curls
Soy curls are so versatile. They can be used as vegan beef, chicken or even seafood. Check out these recipes for more ways to add them to vegan dishes!
- If you don’t want to fry soy curls, this Curried Soy Curls dish bakes them instead, It’s seasoned with curry powder and drizzled with a sesame-cinnamon dressing!
- This Sweet and Sour Soy Curls Recipe is deep-fried and tossed in a sweet and sour sauce. It’s crunchy, addictive and super fun to make.
- I love this Vegan Chicken and Rice Soup. It’s so warm and comforting, and fills your kitchen with aromas of rosemary, thyme and sage.
- Sub clams with soy curls in this New England Vegan Clam Chowder recipe. Chopped soy curls add an amazing texture to this veganized classic chowder dish.
- This Red Curry Sauce is perfect with battered and fried soy curls. It’s also super versatile and can be used with tofu and vegetables.
Get This Recipe In Your Inbox
Share your email, and we’ll deliver it straight to your inbox.
Plus, enjoy new content every week as a bonus!
Vegan Mongolian Beef
This vegan Mongolian beef is so good! Crispy, fried soy curls are tossed in a super flavorful and deeply rich sauce and served with rice. This is an indulgent dish that’s perfect for nights in, snuggled up with a good movie or conversation.
- Total Time: 1 hour 10 minutes
- Yield: 2 servings
Ingredients
for the vegan beef
- 2 cups Butler Soy Curls
- 1 TB hoisin sauce
- 3/4 cup cornstarch
- 1 cup vegetable or canola oil
- 1 TB vegetable or canola oil
for the sauce
- 2 teaspoons grated ginger
- 2 teaspoons grated garlic
- dried or fresh chilis, to taste
- 1/4 cup soy sauce
- 3/4 cup vegetable broth
- 2/3 cup brown sugar
to finish and serve
- 2 TB cornstarch, blended with 4 TB cold water
- steamed rice or noodles
- broccoli or other steamed greens
- chopped scallions
- fresh Thai chilis, sliced or red pepper flakes
Instructions
to make the vegan beef
- First, reconstitute the soy curls by placing them in a medium-sized saucepan. Add enough water to cover them. Cover and bring to a small boil, then turn off he heat, allowing them to sit for about 10 minutes.
- Drain the soy curls well, then press out as much water as possible. I did this by squeezing them through two stacked fine-mesh sieves, then pressed again by mashing them in the sieve with a strong spoon. It’s important to get out as much moisture as possible. You could also place them in between towels and apply weight to remove the moisture.
- Once fully pressed, place the soy curls into a large bowl and toss with the hoisin sauce. Once evenly coated, sprinkle with only 1/4 cup of the cornstarch. Set aside.
to make the sauce
- To make the sauce, warm the oil over medium-low heat for a minute or two, then add in the ginger and garlic. Saute for a few minutes until softened but not browned, stirring frequently. Add in the chilis if desired and saute for a minute more. Add in the soy sauce and broth, stir, then add in the brown sugar. Bring to a small simmer over medium heat until the sugar has dissolved. Remove from the heat and set aside.
to fry the vegan beef
- To fry the soy curls, place the oil into the bottom of a heavy pan (I used a cast-iron pan) so that there is about a 1-inch layer of oil. Heat over medium-high heat for 5-7 minutes, or until the oil reaches 350-375 degrees OR sizzles immediately when you throw a pinch of cornstarch into it.
- Divide the soy curls into 4 portions. Sprinkle only one of the portions with 1/8 cup of cornstarch and toss to coat. Tap off any excess, then transfer to the hot oil and fry until golden all over, flipping once (about a minute on each side). Transfer to a baking sheet lined with paper towels to drain while you repeat the process with the remaining soy curls.
to finish and serve the dish
- Return to your sauce. Taste and adjust as desired.
- Warm over medium heat until it reaches a small simmer, then pour in the cornstarch/water mixture whisking until thickened. Remove from the heat and toss with the fried soy curls until well-coated.
- Serve over rice or noodles with chopped scallions and greens on the side.
Notes
If spiciness is not your thing, you can still enjoy this dish! If serving with a guests, you can simply serve finely chopped chilis on the side.
- Prep Time: 25 minutes
- Cook Time: 45 minutes
- Category: Dinner
- Method: Reconstituted, Deep-Fried, Sautéed
- Cuisine: Taiwanese, American
- Diet: Vegan


I don’t see a step indicating the ratio of corn starch to water to be added to the sauce mixture. What am I missing?
Thanks for catching that! The cornstarch slurry was listed with the sauce ingredients and gets used in the final step—but I can totally see how that may be confusing. I just updated the recipe card to clarify that. I hope you enjoy the recipe!
WOW! this is really, really good! I made it for a crowd of dedicated meat-eaters this evening and they all went back for more! I don’t know what a real meat version would taste like, so I have no reference point, but I will say this is fantastic. A once-in-a-while treat, given the frying, but definitely a keeper. Thank You!
Julie,
I love to hear that! So happy it was enjoyed. 🙂
Can this be made without deep frying the soy curls?
Jasmine, the way this recipe is written — the soy curs need to be fried. However, I think you could google breaded/baked/air-fried soy curls and try to find a suitable way to get them crisped up for this recipe … good luck!
I’ve tried a few other recipes and ordered my first ever batch of soy curls to attempt this one. I think I’ll use the air fryer to crisp them up as you suggest. I have to say, I’m torn between what I love more about your site, the recipes or the shooting. It’s all simply divine. What a happy thing I stumbled upon here. Keep em coming! SOOO GOOD!
I’ve made them on camping trips without frying them and they were still a crowd pleaser! Better if fried but still delicious if not.
This recipe was out of this world! It was my husband and I’s first time trying soy curls, and I can’t believe how good they worked for this meal. Love a good asian sauce — this recipe is 10/10 as is, and we will definitely be making it again.
Courtney, I’m so happy you and your husband enjoyed, and thanks for your feedback. Soy curls are amazing … a great pantry staple!
My family said this was a perfect 10. Used the suggestion to cut the soy sauce in half and it came out great. Thanks for the recipe!
Great dish. Be careful frying the soy curls though. I over cooked the first batch! They can get away from you quickly. However, once I got it together, everything turned out great!!! Served with stir fried frozen veggies and rice noodles! I will definitely make this again! Thank you for a great vegan recipe….
Thanks so much! Crazy good! 1/4 C soy sauce was perfect and portioned it for four servings.
Randal, So happy you liked! Thanks for your feedback.
I made them with 1/2 cup each vegetable broth and soy sauce and they were delicious but also crazy salty. Next time I might try 1/2 cup vegetable broth, 1/4 cup soy sauce, and 1/4 cup water.