
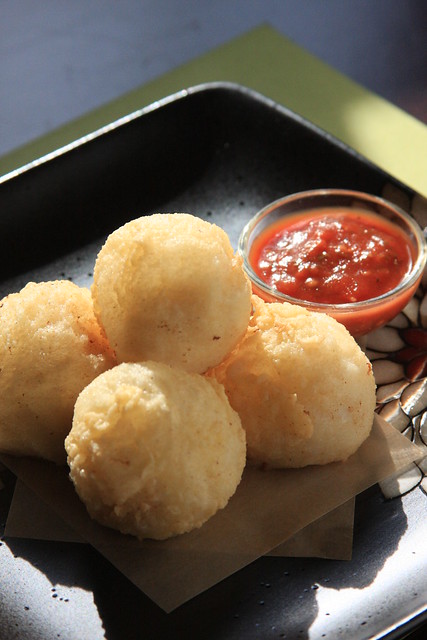
Eatocracy’s 5@5 recently listed a method for making vegan ricotta cheese using molecular gastronomy techniques, which immediately caught my attention for its simplicity, innovation and creativity. One can of coconut milk, a splash of coconut vinegar, a sprinkle of salt and some agar somehow all work together to produce a rich, creamy, mildly crumbly and very versatile dairy-free mozzarella/ricotta. This cheese would make a perfect ravioli filling, pizza topping or lasagna layer, but I decided I would deep fry it to see what would happen. When the coated ricotta hits hot oil it slightly melts, while the shell around it becomes puffy, crispy and airy. When removed from the oil, it still retains its original shape and flavor, and is lovely dunked into a simple marinara sauce.
Get This Recipe In Your Inbox
Share your email, and we'll deliver it straight to your inbox.
Plus, enjoy new content every week as a bonus!
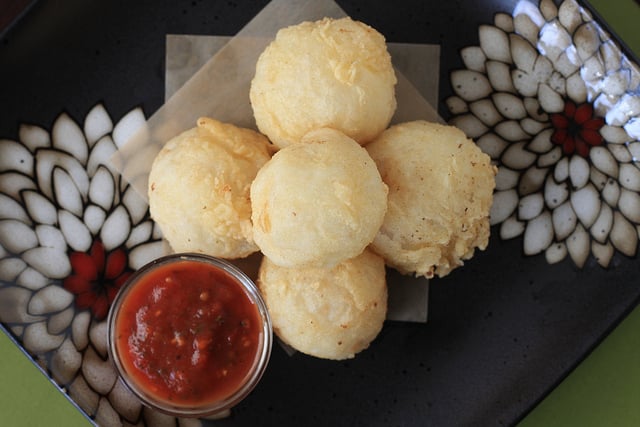
DEEP-FRIED VEGAN RICOTTA PUFFS
- Yield: 4 servings
Ingredients
- One can of full-fat, good-quality coconut milk
- 1/2 tsp coconut vinegar
- 2/3 tsp salt
- 5 tsp agar flakes
- 1/4 cup all-purpose flour
- 1/4 cup cornstarch
- 3 TB chickpea flour
- 1 tsp baking powder
- 1/2 tsp salt
- 1/2 tsp Ener-G, whisked with 5 TB water
- oil for frying
- marinara sauce, for serving
Instructions
- Heat the coconut milk in a small saucepan over medium-low heat. Whisk until well-emulsified. Add in the vinegar, salt and agar and whisk continuously for five minutes. Increase the heat to medium and continue to whisk for five minutes more.
- By this time, it should be coming to a small boil. Continue to whisk at a small boil for about two minutes more and then remove from the heat.
- Pour the mixture into a shallow glass pyrex dish, cover with saran wrap, and place in the refrigerator overnight to gel.
- Scrape the gelled mixture into a food processor and blend until it resembles a ricotta texture. Roll into golfball sized balls and place back into the refrigerator.
- When you are ready to fry, combine the flours, baking powder and salt in a bowl. In another bowl, place the Ener-G/water mixture.
- Heat plenty of oil in a small saucepan over medium high heat. Test the oil’s readiness by inserting a wooden spoon into it—if bubbles form around the spoon immediately, you are ready to fry.
- Dip the ricotta into the Ener-G mixture, then coat with the flour mixture. Slowly slide it into the oil and fry for about a minute and a half, in batches of two or three pieces.
- Remove and place on paper towels to drain. Serve immediately with the marinara sauce.


I just tried making the ricotta, and texture-wise it turned out great! But like Cyndi above, I find the coconut flavor and smell really comes through. I tried upping the vinegar bit by bit until it was several times more than in the original recipe, but it didn't help very much. I guess it's possible the coconut taste won't come through as much when using it in an actual dish. If not, I suppose I'll just have to use it for dessert ravioli or something. : )If anyone has used a similar method, ie first gelling with agar and then blending, but with a different base than coconut milk, I'd love to hear how it turned out!
Would using the Vegg work instead of Ener-G? I have some Ener-G, but it's getting kind of old, and I haven't used my Vegg yet. I was just wondering if the flour would stick to the Vegg as it would to the Ener-G.
The Vegg doesn't really have any of the repelling/binding qualities that Ener-G has — plus the eggy taste may not work here, so I wouldn't recommend it. I think you would have a better chance of using your older Ener-G. I hope you enjoy!
Such abeautiful snack. I love ricotta so much. Have to make them for the oscars!
I've made this cheese a few times, and have been delighted with the results. However, I do find that it tastes like coconut. Is there a specific brand of coconut milk you use? Perhaps it's milder than what I've used–I've tried both the whole foods 365 brand and Thai Kitchen brand.
Thanks for trying the recipe out, cyndi, and for your feedback! I use Thai Kitchen unsweetened everytime — you could maybe try to increase the vinegar a bit to counteract the flavor a bit more?
Thanks! I'm excited to try that new mac and cheese recipe…
AshleyBeee: Coconut vinegar has a very distinct taste to it, and I'm not sure that another vinegar would give this cheese the same kind of authentic flavor. I bought a huge bottle of it for four bucks, and its been a great investment!
Could you use any other kind of vinegar? What is different about coconut vinegar anyway? I saw it on the shelf at the store yesterday but I didn't look at it too closely…
Anonymous: glad you like the recipe! As far as keeping in the fridge/freezing, I think a few days/maybe? I ate it in one day, so I can't verify my answer : ) — if you do try freezing, let me know how it turns out!
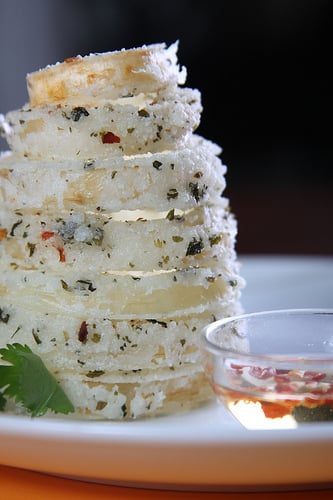
thanks…once I looked at the recipe again, I did use agar powder, not flakes. I'll have to look for the flakes next time I'm at the health food store. That probably made the difference. Since mine was so gelled, I might try just slicing it into sticks next time and making fried "mozzarella-ish" sticks.
So easy and delicious, I'll be trying this often. Any ideas on how long it could stay in the fridge, or if it can be frozen?
sampled a bite before sticking it in the food processor, and even my omni husband said "tastes like string cheese"I ran into a problem with the food processing part though. Mine stayed more the consistency of grated parm, and I couldn't get it to stick into a ball. Was I just too impatient with the food processor? Or should I be adding something in with the "cheese" to make it stick together better?
Anonymous: it sounds like it may be your agar. It varies a lot in consistency and quality from batch to batch, which may have absorbed too much of the coconut milk, hence the crumbly texture. However! this also tastes amazing melted over a pizza (or check out my mac n' cheese recipe). Maybe a drop or two of soy milk would make it a little more adhesive? Glad you enjoyed the taste — its amazing how cheesy it tastes!
Thanks Angry Asian! This would be perfect for raviolis! Ener-G mimics what an egg would do — gives the mixture some goopiness for binding. You can achieve the same thing by grinding up flax seed and mixing the powder with water. Thanks for stopping by!
can i just tell you how incredibly impressed i am with this, and so excited over it? i'm now dairy free & i have missed having cheese stuffed raviolis etc.
what does the Ener-G do?
Oh my wow. This is amazing! I must, must, must try this (gluten-free version, though).
super cooooool!! i need to try this ricotta!
how fascinating – whoever would have thought that would work? 🙂
I'm not vegan, but a vegetarian – however I do dabble and enjoy eating los of vegan meals. Vegan cheese is still hit and miss for me, but now i have to try this recipe – yipee for homemade cheese.
Okay, anything deep fried is a-ok with me. These sounds fascinating! I think I would be caught with 5 of them in my mouth at the same time 🙂
This is such a great idea, I can't wait to try it!
Looks so good! I bet my 2 year old would even try this. She's going through a picky phase—at least I hope it's a phase.
that looks absolutely delicious! you are amazing!!
Holy. Oh. My. Goodness!