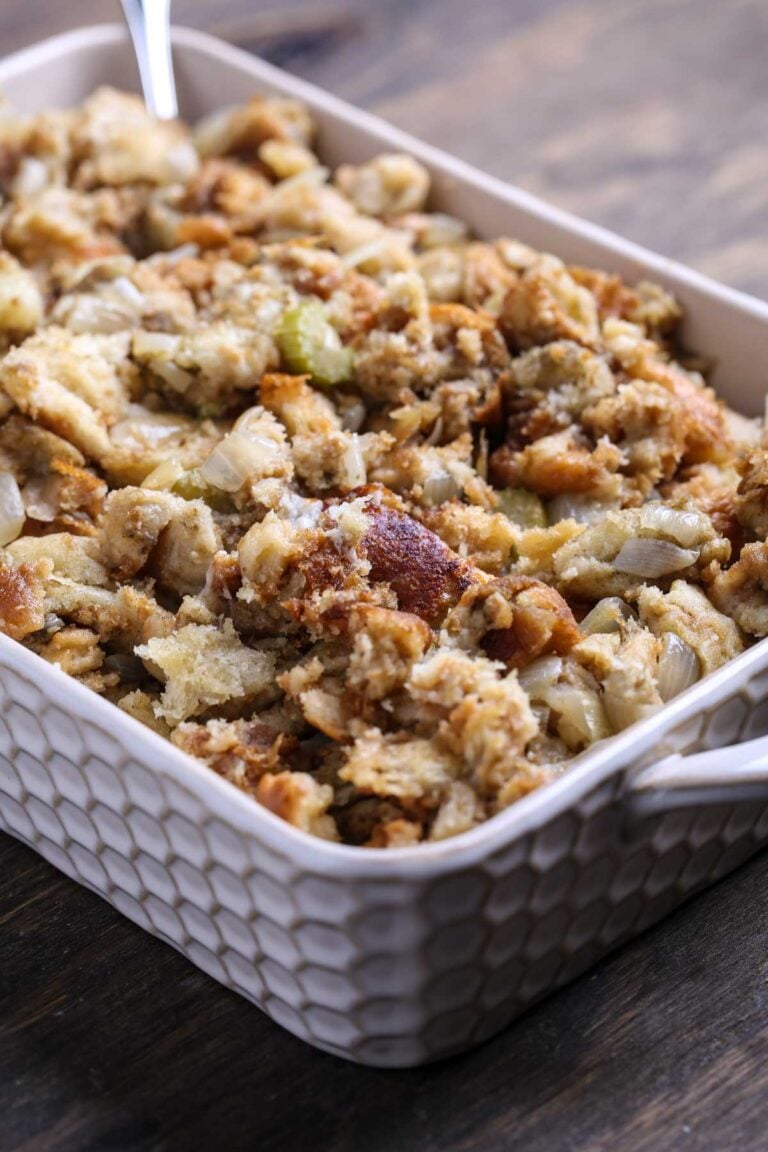
Think you need potatoes for perfect fries? Think again. Panisse is the crispy, golden snack made from chickpea flour that’s about to change your fry game.

Two ingredients (with a little help from olive oil and seasonings) are all it takes to create something that can vibe with your veggie burger or snuggle up to any sandwich. Enter panisse: crispy, golden, protein-packed fries that are somehow minimalist and magical all at once. No potatoes? No problem. Chickpea flour and water team up to reinvent fries in a way that’s easy, delicious, and just a little unexpected.
These crispy bites are what happens when French fries get a protein makeover—crispy on the outside, soft and creamy on the inside, and perfect paired with a garlicky homemade aioli or whatever sauce you’ve got handy. This simple recipe is easy to make, fun to eat, and might just become your go-to sidekick for plant-based burgers, wraps, or straight-up snacking. Let’s make it happen.
Why You’ll Love This Recipe
This recipe proves that less can be more when it comes to flavor and texture. With just a handful of simple ingredients, you can create crispy, golden vegan fries that feel like kitchen magic. Whether you’re upgrading veggie burger night or chasing the perfect snack, panisse delivers big flavor with minimal effort. Here’s why you’ll love it:
- Minimalist pantry magic: Simple ingredients, big payoff. With chickpea flour as the star, these fries are golden, crispy, and ridiculously easy to make.
- Mediterranean comfort food: Think of panisse as fries with a touch of French sophistication. Light, crispy, and perfect for dipping, they bring a little elegance to every bite.
- Protein-packed perfection: Loaded with plant-based protein, these fries are as satisfying as they are delicious. Snack smarter, not harder.
- Texture goals unlocked: A golden crust with a creamy, soft interior? Yes, please. It’s a texture party that your usual fries offer without all the the carbs.
- Dipping dreams: Panisse was made for sauces—garlicky aioli, spicy ketchup, or even marinara. The fries may be minimalist, but the dip options are limitless.

Key Ingredients
This recipe keeps it simple with a handful of pantry staples that come together to create crispy, golden panisse perfection. Chickpea flour sets the stage, olive oil adds richness, and a pinch of salt and pepper brings it all to life. Sometimes, less really is more. Here’s what you’ll need:

- Chickpea Flour: The MVP of this recipe. Naturally gluten-free and packed with plant-based protein, this nutty, earthy flour creates the creamy inside and crispy outside that make panisse so irresistible.
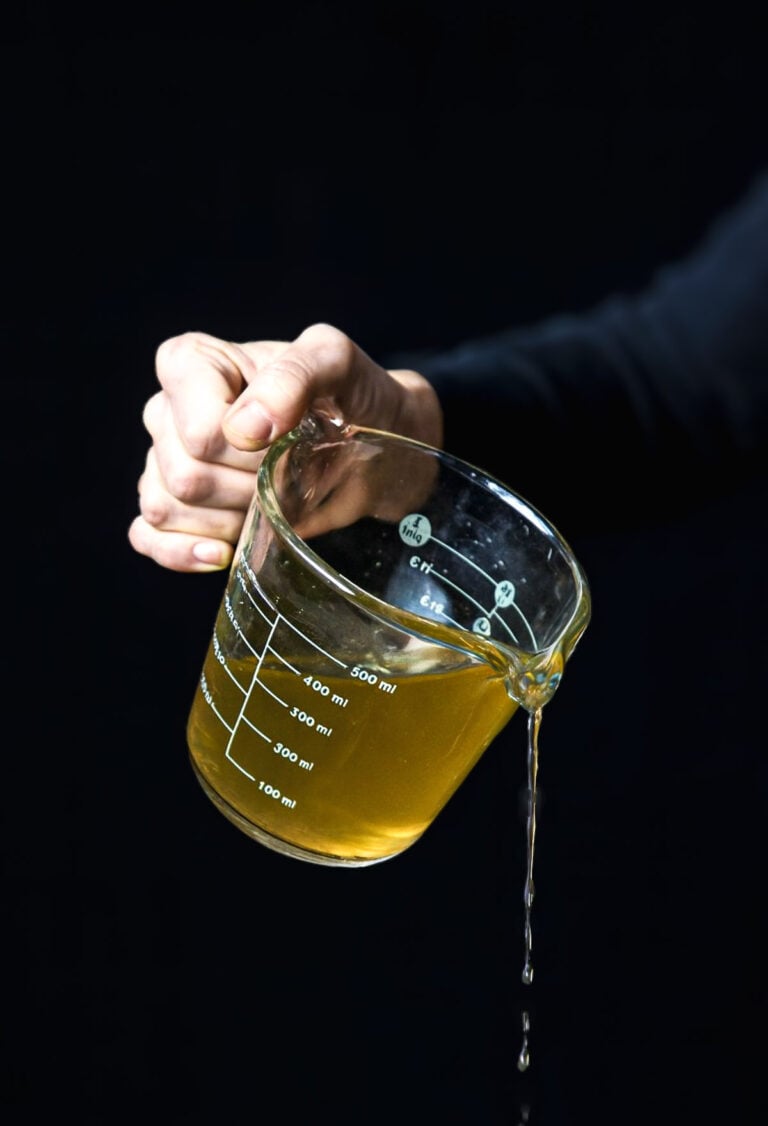
- Water: It might not sound exciting, but it’s the secret sauce for binding the batter and turning chickpea flour into golden fry magic. Pro tip: cold water works best for the smoothest batter.
- Olive Oil: A dual-purpose hero. It adds richness to the batter and helps create its perfectly golden crust.
- Salt and Pepper: These pantry staples do more than season—they elevate the nutty flavor of the chickpea flour and balance the richness of the olive oil. A little goes a long way for maximum flavor.
Herb Your Enthusiasm
How To Make Panisse
Making panisse is easier than you’d think—just a few simple steps stand between you and crispy, golden fry perfection. The process is super simple, and once you’ve mastered it, you’ll be making these on repeat. For full recipe details, scroll to the end of this post!
- Step 1: Grab Your Dish: Pick an 8X8 glass dish (anything a little bigger or smaller works too) and spray it generously with cooking spray.
- Step 2: Mix It Up. Combine chickpea flour, water, olive oil, and salt and pepper in a bowl and whisk until smooth. It’s like making pancake batter, but for fries.
- Step 3: Batter Up. Preheat a couple of tablespoons of oil in a large saucepan over medium-high heat for about 1–2 minutes, then carefully pour in the batter.
- Step 4: Whisk It! Grab a strong whisk and stir continuously until the mixture thickens and starts pulling away from the sides of the pan. This takes about 5 minutes.
- Step 5: Chill Out. Pour the thickened batter into your greased dish, smooth the top with a spatula, and cover loosely with foil. Chill in the fridge for about an hour to allow it to set.

Step 6: Slice It Up. Once chilled, carefully remove the batter from the dish with a spatula and slice it into fry-sized pieces—about 1/4-inch thick and 3 1/2 inches long for sturdy dipping perfection.
Step 7: Fry to Golden Glory. Deep fry or pan fry in a non-stick skillet until golden and crispy all over. Serve piping hot and enjoy!
How To Serve
Panisse is what happens when fries get a creative twist—they’re crispy, golden, and ridiculously versatile. From burgers to wraps to fully loaded fry platters, these chickpea fries are ready to level up whatever’s on your menu. Here are some of the best ways to serve them up!
- Vegan Burger Sidekick: These crispy vegan fries are the ultimate pairing for your favorite veggie burgers. Try them with our black bean and sweet potato burgers, beet burgers, buffalo cauliflower burgers, plant-based pulled pork sandwiches, or whatever store-bought option is chilling in your freezer—they all love panisse on the side.
- Wrap It Up: Whether it’s a falafel-stuffed pita (you’ll love our lentil-based, fava bean, and classic style!) a roasted veggie wrap, or even a hummus-loaded tortilla, panisse fits right in. Crunchy, golden fries tucked into your handheld? Yes, please.
- Sandwich Hero: Serve panisse alongside any sandwich, like our epic tempeh reuben, fried tofu sandwich or our plant-based lobster roll. The crispy fries + sandwich combo = a protein-packed powerhouse lunch or dinner.
- Loaded Fry Magic: Take panisse to the next level by piling it high with melted vegan cheese (find great dairy-free options here), dollops of plant-based sour cream, chopped green onions, and a drizzle of hot sauce or BBQ sauce. Pro move: sprinkle on some crispy chickpeas or jalapeños for an extra wow factor.
- Snack Time Solution: When hunger strikes, have a batch of panisse chilling in the fridge, ready to fry up. Crispy, protein-rich, and satisfying, these fries make the perfect mid-afternoon pick-me-up or late-night snack.
FAQs
Panisse is made primarily from chickpea flour and water, which are mixed into a smooth batter. This batter is then cooked until thickened, seasoned with salt, and formed into shapes before being fried or baked to crispy perfection. It’s a simple yet delicious gluten-free snack that’s also high in protein.
Yes, chickpea flour is naturally gluten-free, making it an excellent choice for those following a gluten-free diet. It’s made by grinding dry chickpeas into a fine powder, offering a nutritious, high-protein, and versatile alternative to traditional wheat flour.
Yes, you can bake or air fry panisse, but keep in mind it won’t be as crispy as the fried version. For air frying, set the temperature to 400°F and cook for about 10 minutes, flipping halfway through for even crispness. If baking, place the panisse on a baking sheet, brush with olive oil, and bake at 400°F for 20-25 minutes, flipping once, until golden and crispy. While not quite as crispy as frying, both methods still deliver a tasty, lighter alternative.

Love Chickpeas? Check These Recipes Out!
- Pasta with Roasted Tomatoes and Chickpeas
- Chickpea Fries with Yogurt-Tahini Sauce
- Buffalo Chickpea Tacos
- Chickpea Salad Sandwich
If you try this panisse recipe, please leave a comment and star rating! I love hearing your feedback.
Get This Recipe In Your Inbox
Share your email, and we’ll deliver it straight to your inbox.
Plus, enjoy new content every week as a bonus!

Easy Panisse Recipe
These crispy, golden panisse fries are here to change everything you thought you knew about fries. Made with just chickpea flour and water, they’re protein-packed, crispy on the outside, and soft on the inside. Whether you’re serving them with a veggie burger, dipping them in aioli, or just snacking straight from the pan, this simple recipe is about to become your new favorite.
- Total Time: 1 hour 25 minutes
- Yield: 4 servings
Ingredients
- 1 cup chickpea flour
- 2 cups cold water
- 1 tablespoon olive oil, plus 2 tablespoons
- 1/2 teaspoon salt
- 1/4 teaspoon pepper
- 2–4 tablespoons olive oil, if pan frying
- neutral cooking oil, like canola or vegetable oil, if deep frying
Instructions
to prepare the batter
- Spray a 8X8 glass dish with cooking spray. Something a little smaller or larger is fine.
- Make the Batter: In a medium-sized bowl, whisk together the chickpea flour, cold water, 1 tablespoon of olive oil, salt, and pepper until smooth.
- Cook the Batter: Heat the remaining 2 tablespoons of oil in a large saucepan over medium-high heat for about 1–2 minutes. Carefully pour in the batter, and whisk continuously, or the batter will stick. Keep stirring until the mixture thickens and begins to pull away from the sides of the pan, which should take about 5 minutes.
- Set the Batter: Immediately transfer the thickened batter into the greased dish and smooth the top with a spatula. Cover loosely with foil and refrigerate for at least an hour to let it set.
- Slice the Panisse: Once the batter is firm and chilled, carefully remove it from the dish with a spatula and slice it into fry-sized pieces—about 1/4-inch thick and 3 1/2 inches long.
to fry the panisse
Pan-Fry Option:
- Heat 1-2 tablespoons of olive oil in a non-stick skillet over medium-high heat.
- Once the oil is hot, add the panisse pieces and fry until golden brown and crispy on all sides, about 2-3 minutes per side. Work in batches if needed, adding a little more oil as needed. Remove and drain on paper towels. Add a little salt and serve immediately.
Deep-Fry Option:
- Fill a deep pot or cast-iron pan with several inches of neutral vegetable oil. Heat over medium-high heat for about 7 minutes.
- How to Check If Oil Is Ready: Test the oil by dipping a wooden chopstick into it, touching the bottom of the pot. If bubbles form around the chopstick immediately, the oil is ready for frying. If not, wait another minute and test again.
- Once the oil is ready, carefully add the panisse pieces in batches, ensuring they don’t overcrowd the pot. Fry until golden and crispy on all sides, a few minutes per batch.
- Remove the fries from the oil and drain on paper towels. Sprinkle immediately with some salt Serve immediately while hot.
Notes
- Storage: If you’re not frying up the whole batch, you can store the batter in the fridge until you’re ready to use it. Just slice off the amount you want to fry and leave the rest for later. The batter will keep for a couple of days, making it perfect for meal prep!
- Reheating: Panisse is best enjoyed fresh and hot, but if you have leftovers, reheat them by tossing them in a hot pan with a little oil until they’re crispy again. It’s a quick way to bring back that golden crunch.
- Pro Tip: To infuse with more flavor and make it pop, sprinkle the panisse with salt immediately after frying, while it’s still hot, so it sticks.
- For an extra flavor boost: Sprinkle with fresh herbs like thyme, rosemary, or parsley—or even add them directly into the batter for more flavor!
- Prep Time: 10 minutes
- Chill Time: 1 hour
- Cook Time: 15 minutes
- Category: Appetizer, Snack
- Method: Roasted, Fried
- Cuisine: French, Mediterranean
- Diet: Vegan


I love socca but have never made them into fries! What! Where has this been all my life? Looks so delicious and fun! Can't wait to try these out!
Wow, this looks awesome, nice photos too! I just heard of chickpea panisse and your recipe came up when I tried to find out details– looks like I'd better get myself some chickpea flour!
Wow, these are great! For those who were wondering about baking, after slicing them, I put them on a cookie sheet and sprayed with olive oil spray and sprinkled with s&p. I baked at 350 for about 20-30 minutes and then stuck them under the broiler for 2-3 minutes to really crisp them up.They were great! Thanks for all your great recipes! =)
Thanks for the baking tip, kp! I will try your method next time I make these. : )
I have already made this a couple of times and I must say it is very delicious! The only thing we were leery about was the amount of oil in everything. Total of 6 TB of oil for sauce, fries, and heating up. This of course is our personal preference with our fat intake, but we tried doing everything with just a total amount of 1 TB and 2 tsp of oil (1 tsp in the fry mixture, 1tsp for the garlic in the oven, and one TB to heat up the fry mixture). It came out just as good! Thank you so much for introducing this recipe to us. And keep up the amazing photography that sells everything.
I'm glad that you enjoyed the panisse, Danielle, and were able to modify the oil in it with almost identical results. And thank you for your kinds words on the photography! : )
How do these re-heat? Curious about leftovers!
Daphne
I think these may reheat well in a hot pan with a little oil, although I haven't tried it. I made a large batch, then just cut and fried them in smaller batches.
if i ever get my booty up to boston, can i come over and have you make these for me? pretty please….. 😉
You would be an awesome dinner guest, Caitlin! Yes, come to Boston! : )
Hi Erin!
Over the past few days, I discovered my loooove for Chickpea Flour! I just had things made from chickpea flour 2 times today.. 😀 These fries look amazing. I'll DEFINITELY try them tommorow!
And I wanted to say, I really like your blog. Your husband and you seem to be just the perfect couple. Extraordinary recipes (How cool are those spheres and homemade cheeses??) + fantastic photography result in one happy Lara 🙂
Best wishes, Lara
Thank you for your kind words, Lara … and I hope you like the chickpea fries!
That is so interesting! I have never heard of such a thing. I bet they have an amazing texture.
Awesome presentation and explanation! I'm going to start posting more flavored vegan mayo's too!
I can imagine the chickpea taste with the wonderful garlic…. so much better than boring fries!
I've never heard of socca before, yet use chick pea flour often in baking/cooking! I wonder if baking these "fries" would work? Gotta be worth a try, I'm not too keen on frying things! They sound good, though, and roasted garlic aoli, oh yes!!!!
I fried the leftovers in just a bit of oil and they were still fantastic! I've never baked fries before, but I think regular instructions for baking potato fries may do the trick!? Enjoy!
That looks absolutely awesome.
Holy moly! What a great idea! I am a serious fan of socca (though I know it as "torta di Ceci" I love the idea of making fries with it. Che yums!
YES so much delicious! this looks so interesting, i need to try chickpea fries!
oh god, that looks SOOO good!
Thank you Melody — happy new year!